
Hydration Systems: Complete Guide
Comprehensive technical analysis of sizing, materials, installation requirements, and manufacturer standards for hydration systems.


Recommended Products
See the full ranking →
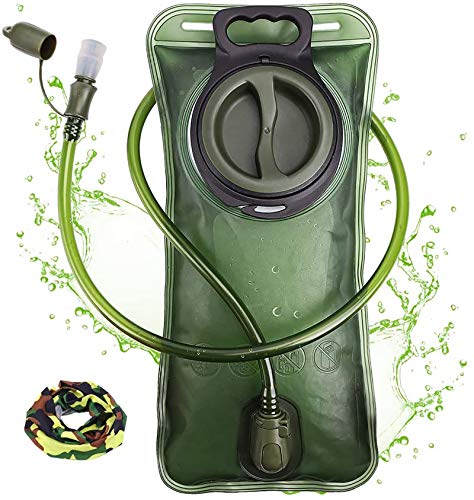
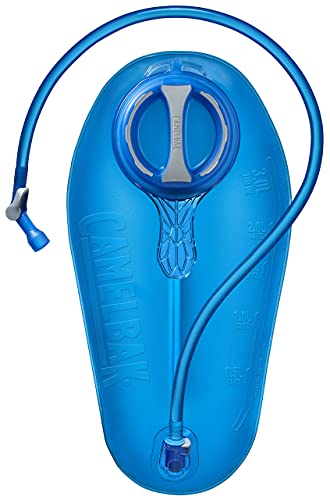
A hydration system — reservoir, hose and bite valve, or bottles — keeps a hiker drinking on the trail. A reservoir lets a hiker sip through a hose without breaking stride or removing the pack. Bottles trade that hands-free access for faster refills, simpler cleaning, and fewer failure points. Most hikers who own a pack with hydration-sleeve compatibility run a reservoir for on-trail sipping and still carry at least one bottle as backup or for treating water separately from what's already in the bladder.
A reservoir lets a hiker drink through a hose without stopping, holding 1.5 to 3 liters in a padded sleeve against the back; bottles require unclipping and tipping the head back, but they fill faster, are easier to inspect for mold, and rarely fail outright. Neither format wins on every count, so the choice comes down to trip length, climate, and how much cleaning time a hiker is willing to spend after the trip.
| Attribute | Reservoir | Bottles |
|---|---|---|
| Access while moving | Hands-free, bite valve to mouth | Stop, unclip, tip back |
| Typical capacity | 1.5–3L in one bladder | 0.5–1L each, usually 2–3 carried |
| Refill speed | Slow — wide fill port, awkward angle | Fast — open top, dip or pour |
| Cleaning | Disassembly plus full air-drying | Rinse and air-dry, some dishwasher-safe |
| Common failure | Hose kink, bite-valve leak, bladder puncture | Cracked cap seal, dropped and lost |
| Remaining volume | Hard to judge by feel | Visible through clear or marked sides |
| Cold-weather use | Hose and bite valve can freeze | Bottle contents can freeze solid too |
A framed pack built around hydration-sleeve compatibility carries a reservoir close to the spine, which keeps water weight centered and low rather than swinging in side pockets. Bottles carried in hipbelt or side-mesh pockets sit further from the body's center of mass, which matters less on a day hike but adds noticeable sway on technical terrain with a loaded multi-day pack. Many hikers run both: a 2-liter reservoir for steady sipping plus one bottle reserved for electrolyte mixes or as a dedicated dirty-water container when filtering from a stream.
Clean a hydration bladder after every multi-day trip and at least monthly with regular use: rinse with warm water, wash the interior with a diluted bleach or baking-soda solution, scrub the hose with a brush, then air-dry the bladder fully open before storing it, since any residual moisture left inside grows mold within days. A bladder that smells musty or shows dark specks along the seams needs a full clean before its next fill, not just a rinse.
The reservoir's wide fill opening — usually 2 to 3 inches across on modern designs — exists mainly to make this cleaning step possible, since narrower openings from older bladder designs can't fit a brush or a hand. A dedicated cleaning kit with a reservoir brush, a hose brush, and a drying arm removes most of the manual awkwardness; without one, a few grains of uncooked rice or a length of paper towel dropped inside and shaken with soapy water works as a rough substitute for scrubbing. The full walkthrough on how to clean a hydration bladder covers exact bleach ratios, drying times, and freezer storage for hikers who want a step-by-step reference.
Reservoir size should match trip length and water availability: 1.5 to 2 liters covers a half-day hike between refills, 2 to 2.5 liters suits a full day with moderate water access, and 3 liters suits hot climates or long dry stretches. A full 3-liter reservoir adds roughly 6.6 pounds of water weight on its own, so bigger isn't automatically better once a hiker accounts for how much of that weight actually gets used between refill points.
| Reservoir size | Best suited to |
|---|---|
| 1.5L | Short day hikes with frequent water sources |
| 2L | Full-day hikes, standard capacity on most daypacks |
| 2.5L | Long day hikes or mild multi-day use |
| 3L | Hot climates, dry sections, thru-hiking resupply gaps |
Reservoir size should also match the pack's hydration sleeve, since a 3-liter bladder won't sit flat inside a daypack built around a 2-liter sleeve and will bulge the back panel. Hikers deciding between capacities should weigh how much they're willing to carry against how far apart water sources sit on their usual routes; the buying guide on the best hydration bladders breaks down capacity, hose design, and bite-valve style against those same trip variables.
Prevent a hydration hose from freezing by blowing air back into the reservoir after every sip, insulating the hose with a neoprene sleeve, and routing it under a jacket instead of leaving it exposed; below roughly 20°F even these steps can fail. Starting the day with warm rather than cold water buys extra time, and many winter hikers still switch to insulated bottles carried inside the pack as a backup once temperatures drop that far.
Blowing the water back into the reservoir after each drink is the single most effective habit, since it clears the hose of standing water that would otherwise freeze in the exposed tube. An insulating sleeve slows heat loss along the hose but doesn't stop it outright, and a bite-valve cover keeps wind off the valve itself, which freezes first because it holds the least water and sits furthest from body heat. Packing the reservoir upside-down, with the fill port at the bottom and the hose exit at the top, also delays freezing, since it forces trapped air rather than water to sit at the coldest point near the pack's back panel. Hikers heading into sustained sub-freezing temperatures on a winter or snow route should treat bottles insulated with a wool sock or a dedicated bottle parka as the more reliable backup, since a fully frozen reservoir can't be thawed on the trail without a stove.
Go Deeper
Detailed companion guides for hydration systems.
Best Hydration Bladders
Buyer's guide: best hydration bladder.
How to Clean a Hydration Bladder
Step-by-step method for cleaning a hydration bladder: bleach or baking-soda wash, hose scrub, and full air-drying to stop mold before it starts.
Rain Covers & Liners
Related care, repair & accessories guide.
Packing Aids (Cubes, Sacks)
Related care, repair & accessories guide.