Water treatment methods for hikers
Every liter you drink on the trail has to come from somewhere, and almost none of it is safe straight from the source. This is a plain-language look at the four ways hikers make water drinkable, what each one actually handles, and how to choose a source and a backup so you are never stuck with untreated water.
In plain English
Water in the wild can look perfectly clean and still make you sick. The germs are far too small to see, and an animal upstream can pollute a stream you will never see the source of. So hikers clean their water before drinking it, every time.
There are a few ways to do that. A filter works like a very fine kitchen sieve that catches germs. Tablets or drops use chemicals to kill them, a bit like the chlorine in a swimming pool. A UV pen uses light. Boiling uses heat. Each has strengths and weak spots.
The simplest safe habit is to use two methods that fail in different ways, such as a filter plus tablets. If one breaks, freezes or gets lost, the other still works. And if you feel sick in the days or weeks after a trip, tell a doctor what water you drank.
The short answer
Treat every backcountry water source. Mechanical filters are the practical default for most US trails: fast, reusable, and effective against protozoa such as giardia and cryptosporidium; check the maker's rating before counting on one for bacteria. Chemical tablets are the lightest backup, UV purifiers add virus protection, and boiling works when fuel allows. Carry two methods on remote trips.
Why backcountry water needs treating
Backcountry water gives you nothing to judge it by. A stream can run clear, cold and fast over granite and still carry the organisms that cause days of illness, because the animals, livestock or hikers responsible may be a mile upstream and out of sight. Clarity tells you about sediment, not microbiology.
Three broad groups matter to hikers. Protozoa — mainly giardia and cryptosporidium — are the most common concern on US trails; they are relatively large as contaminants go, which is why filters handle them well, but cryptosporidium in particular resists chlorine and iodine. Bacteria such as E. coli and campylobacter are smaller; the CDC says most portable filters do not remove them, though some microfilters are rated for bacteria, and chemicals, UV and heat kill them. Viruses are smaller again and pass through most backpacking filters; they are an uncommon problem in remote US backcountry and a more serious one in heavily used areas and much of the developing world.
None of this is a reason to be nervous about drinking on the trail — it is a reason to treat water as a routine step, like sunscreen. Waterborne illness usually shows up days to weeks after a trip rather than on trail, so if you develop persistent stomach symptoms afterward, tell a doctor about the water you drank.
This page covers treatment methods in general, not specific products. If you are deciding what to actually buy, our water filter buying guide compares current options in detail.
The four methods compared
Every practical option for hikers falls into one of four categories. None is best at everything — each trades speed, weight, or the range of things it handles.
| Method | Handles | Speed | Weight | Main limits |
|---|---|---|---|---|
| Mechanical filter | Protozoa and sediment; bacteria only if the filter is rated for them (not viruses) | Fast — drink as you pump or squeeze | Light to moderate | Clogs in silty water; ruined by freezing; needs backflushing |
| Chemical treatment | Bacteria, viruses; chlorine dioxide also protozoa | Slow — wait time set by the label, longer in cold or cloudy water | Almost nothing | Wait time; taste; slower and weaker in cold or cloudy water |
| UV purifier | Protozoa, bacteria, viruses | Fast — follow the device directions | Light, but batteries | Needs clear water and working batteries; treats small volumes |
| Boiling | Everything biological | Slow — heat plus cool-down | Stove and fuel you likely carry anyway | Fuel cost; leaves sediment and chemicals; hot water to drink |
Mechanical filters
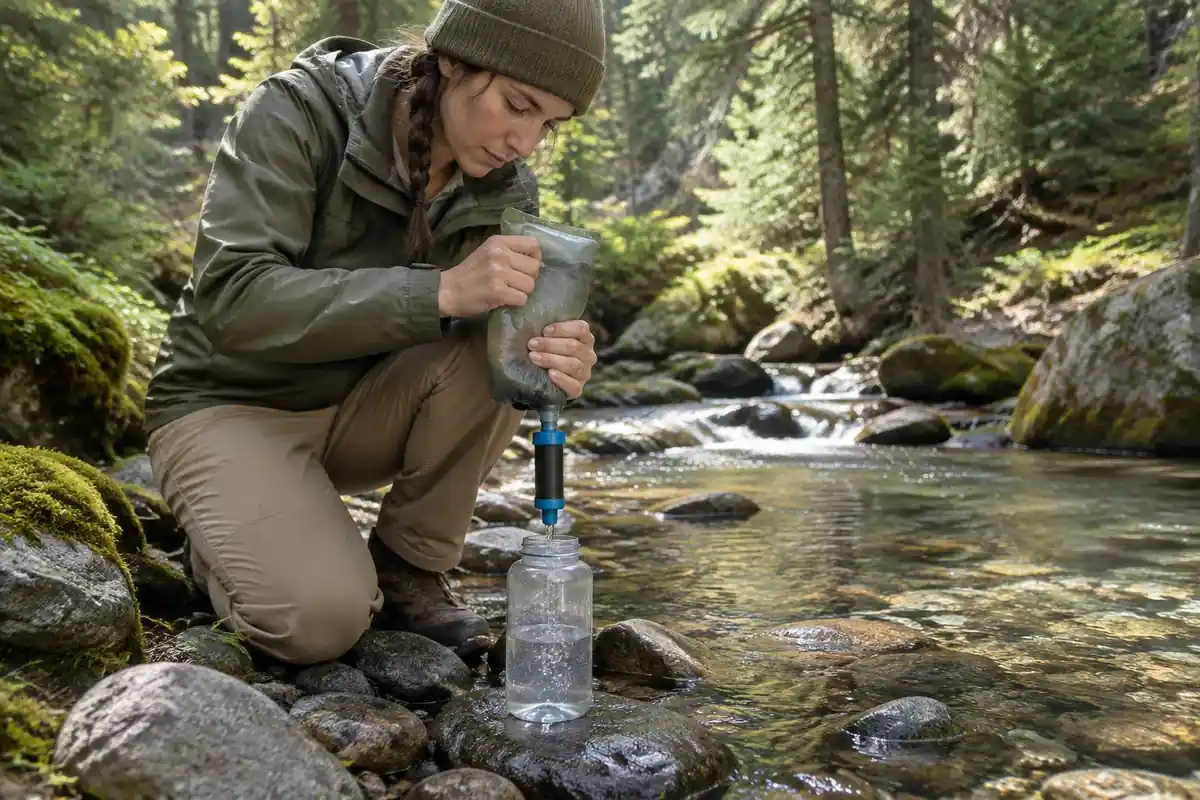
A filter physically strains organisms out through pores too small for them to pass. Most modern backpacking filters use hollow fibers, and the appeal is immediacy: you squeeze, pump, gravity-feed or sip, and the water is ready. They also improve clarity and taste. The trade-offs are real, though. Silty water clogs the fibers and flow slows, so backflushing becomes part of the routine. Freezing is the quiet killer: water trapped inside can expand and split the fibers with no visible damage, leaving a filter that looks fine and no longer filters. And because the pores that stop protozoa are still larger than a virus, a standard filter is not a purifier.
Chemical treatment
Tablets and drops — iodine, chlorine, or chlorine dioxide — kill organisms chemically rather than removing them. They weigh next to nothing, cost little, cannot break, and are unaffected by cold except in how long they take to work. That makes them the natural backup method to carry alongside something faster. The cost is patience and palatability: expect to wait as long as the label says, which can be hours for chlorine dioxide against cryptosporidium. Iodine and chlorine are not reliable against cryptosporidium at all. Cold and cloudy water both slow the reaction, so pre-filter through a bandana and follow the label rather than eyeballing the dose.
UV purifiers
A UV device disrupts the DNA of organisms so they cannot reproduce, and it works across the full range including viruses. It is quick, taking as long as the device directions say, and adds no taste. The dependencies are what limit it: UV needs light to reach the organisms, so cloudy or tannin-stained water must be pre-filtered first, and the whole thing rests on batteries and electronics surviving a trip in a pack. It also treats one bottle at a time, which gets tedious when filling for a group, and sediment stays in the water since nothing is removed.
Boiling
Boiling is the oldest method and the most dependable, because heat handles protozoa, bacteria and viruses with no filter to clog and no battery to die. A rolling boil is sufficient at most elevations, with US public health guidance suggesting about three minutes above roughly 6,500 feet. What you pay is fuel and time, including the wait for water cool enough to drink, and boiling does nothing about grit, chemicals or taste. It is fuel-hungry as a primary method, but on any trip with a stove it is the backup you cannot lose.
Matching a method to the trip
Once you know what each method does, the choice comes down to the trip in front of you rather than a universal winner.
- Day hikes with known water: a filter alone is usually plenty, and often you can simply carry all the water you need.
- Multi-day trips in three seasons: a filter as the workhorse, with tablets tucked in the lid as the weightless insurance policy.
- Cold and winter trips: assume a filter will freeze at some point. Chemicals or a stove should be the plan, not the afterthought.
- Silty, glacial or desert water: pre-settle or pre-filter through cloth before any method, or you will clog a filter and blunt both UV and chemicals.
- Heavily used areas or travel abroad: where viruses are a genuine concern, use a purifier, chemical treatment or boiling rather than a standard filter.
Keep weight in perspective here. Treatment is one of the few categories where the heavier option buys convenience you use at every water stop, so it belongs on the packing checklist alongside navigation and light — not in the pile of things to trim.
Choosing a better water source
Treatment is the last step, not the first. The water you start with decides how well any method works and how long your gear lasts, so be choosy when you have the option.
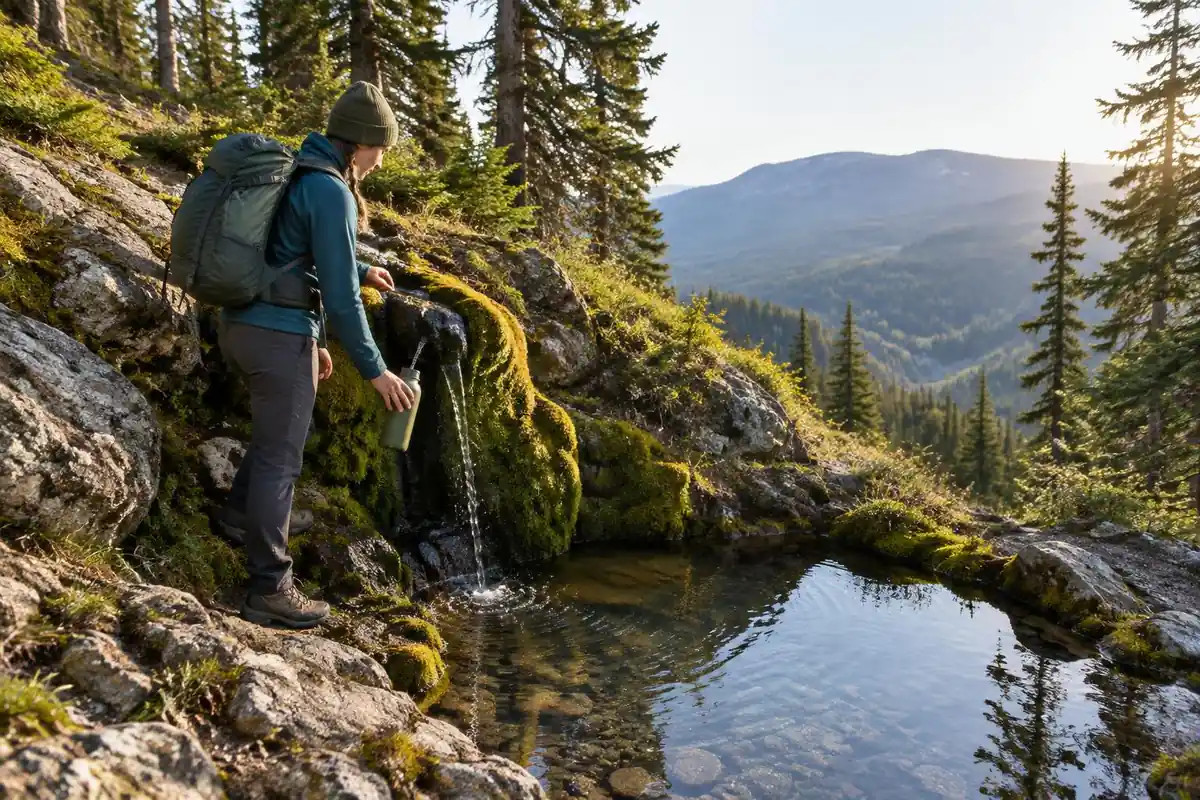
- Prefer moving water to still. A running stream or spring is generally a better bet than a pond or a stagnant pool, where organisms and algae concentrate and sediment is stirred easily.
- Go upstream of trails, camps and grazing. Collect above campsites, trail crossings, pack-animal routes and livestock areas rather than below them — that single choice removes the most likely source of contamination.
- Avoid the obviously bad. Skip water with a chemical or sulfurous smell, a surface sheen, heavy algal bloom, or visible waste nearby. No hiker-scale treatment method deals with chemical pollution, mine runoff or agricultural chemicals.
- Take the clearest water available. Fill from the flow rather than the bottom, use a wide-mouth bottle or a scoop in shallow water, and let silty water settle before treating it.
- Note sources before you go. Check maps and recent trail reports, remember that seasonal sources dry up, and plan carries between reliable water rather than gambling on a blue line.
Source selection is ordinary trail-craft, the same family of habits covered in our hiking dos and don'ts — small early decisions that quietly prevent later problems.
Backup and failure planning
Every treatment method has a failure mode, and none of them are exotic. Filters clog, freeze or get dropped on rock. Tablets get left in a jacket at home. UV batteries die in the cold. Stoves run out of fuel a day early. Each is a minor inconvenience with a second option in the pack, and a real problem without one.
The rule is simple: on any trip where you cannot easily walk out, carry two treatment methods that fail differently. A filter plus tablets is the classic pairing, because nothing that breaks a filter touches a tablet; a UV purifier plus a stove works for the same reason. Two of the same thing covers loss but not the shared weakness.
- Keep the backup separate. Tablets belong in a lid pocket or first-aid kit, not in the same stuff sack as the filter you might drop in a creek.
- Protect the filter from cold. Blow it clear after use and sleep with it inside your jacket or bag when temperatures approach freezing.
- Check it before you leave. Run water through the filter at home, confirm the tablets are in date, and test the batteries — a treatment problem discovered at the trailhead is free to fix.
- Know the boil fallback. If you carry a stove, you always have a last-resort method, provided you also carry enough fuel to use it.
This is general trail-craft, not medical advice. Follow the instructions on any treatment product you use, and if you develop persistent stomach or intestinal symptoms after a trip, see a doctor and tell them about the water you drank.
Do filters stop bacteria? What the sources actually say
Some guides describe mechanical filters as effective against giardia, cryptosporidium and bacteria. Public health sources are more cautious. The CDC's page for hikers says most portable filters remove parasites but not viruses or bacteria,1 and the CDC Yellow Book adds that portable microfilters do not reliably remove viruses such as norovirus.2
The honest reading is that filters are not all the same. Some are rated by their makers to remove bacteria and some are not, and a general statement cannot cover every product. Before relying on a filter alone, read what its maker says it removes and how that was tested. If the answer for bacteria is unclear, pair the filter with chemical treatment or boiling. That also covers viruses, which neither the CDC nor the page expects a standard filter to stop.
Boiling: the numbers behind the rule
The page says a rolling boil is enough at most elevations. Both US agencies ask for more than a brief boil. The CDC's hiking guidance is to boil clear water for 1 minute, or 3 minutes above 6,500 feet,1 and the CDC Yellow Book explains the full minute as a margin of safety.2 The EPA also says at least one minute, but sets the three-minute threshold lower, at altitudes above 5,000 feet.3 If you hike between those two heights, the EPA's longer boil is the cautious choice.
Altitude does not make boiling fail. Water boils at a lower temperature as you climb, but the CDC Yellow Book notes that even at about 16,000 feet, water boils at about 182°F, which is still hot enough to inactivate intestinal germs.2 What boiling cannot do is make water with chemicals, toxins or radioactive material safe.1
Order of operations for murky water
Most methods work best on clear water, so the order matters. The CDC says chlorine bleach and iodine don't work well against parasites, and recommends filtering before chemical treatment; it also says UV light doesn't work well in cloudy water, which should be filtered first.1 The EPA's emergency guidance suggests letting cloudy water settle, then filtering it through cloth or a coffee filter before disinfecting.3
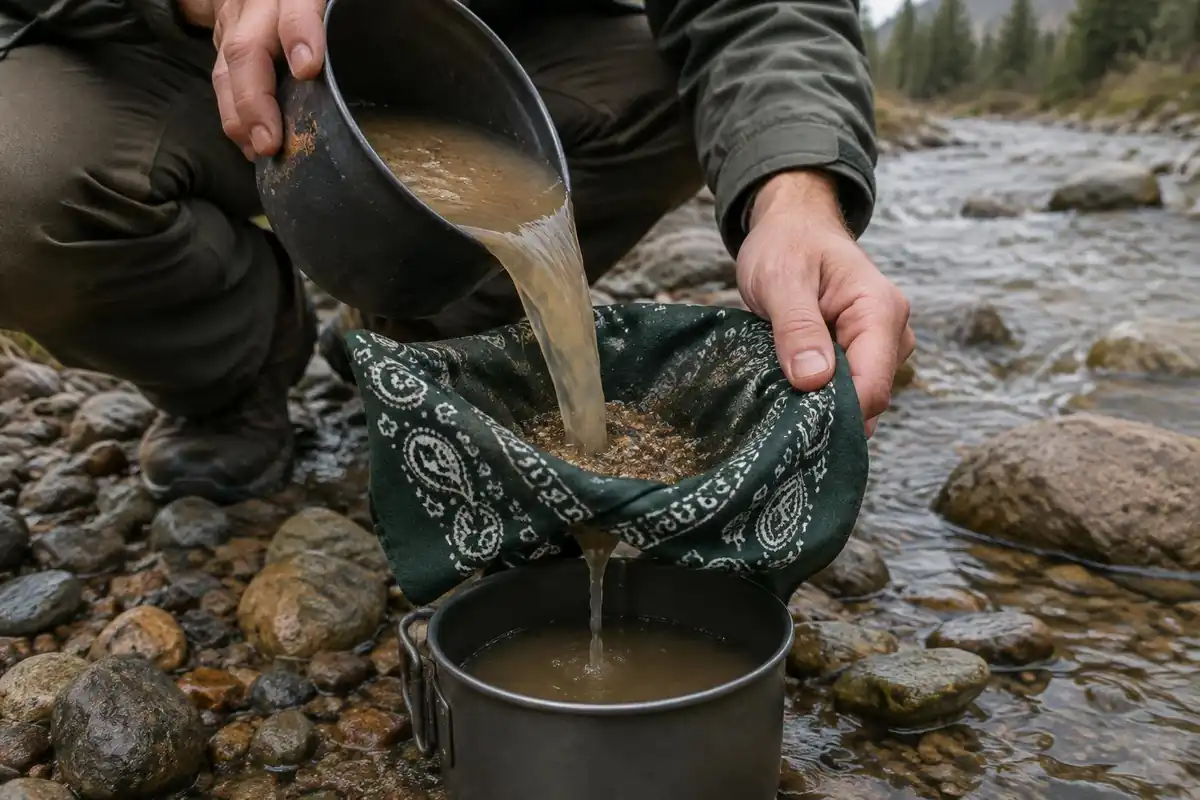
A practical sequence for silty or tea-colored water is: settle, pre-filter through a cloth, filter, then add a chemical or UV step if you want coverage for viruses. For chemical treatment, follow the product's label for amount and wait time. In its household emergency guide, the EPA says treated water should be stirred, left for 30 minutes and should smell slightly of chlorine afterward.3 The EPA also notes that boiling and disinfection do not remove heavy metals, salts or most chemicals,3 so the choice of source still matters.
Frequently asked questions
Can I drink from a clear mountain stream without treating it?
Clear, cold and fast-moving water still carries no guarantee. Giardia cysts, cryptosporidium and bacteria are microscopic, and a source can be contaminated by animals or people well upstream of where you are standing. The sensible default on any trail is to treat everything, because the cost of treating is small and the cost of guessing wrong is a ruined trip.
Does boiling water make it safe to drink?
Boiling is the most reliable method against giardia, cryptosporidium, bacteria and viruses. Bringing water to a rolling boil is enough at most elevations; above roughly 6,500 feet, US public health guidance suggests holding the boil for about three minutes. Boiling does not remove sediment, chemicals or taste, and it costs fuel and waiting time.
Do hiking water filters remove viruses?
Most backpacking filters do not. A typical hollow-fiber filter has pores sized to catch protozoa such as giardia and cryptosporidium, and some are rated for bacteria too, but viruses are smaller and can pass through. In most US backcountry that is an accepted risk. Where viruses are a real concern, a purifier, chemical treatment or boiling is the appropriate choice.
How long do purification tablets take to work?
It depends on the chemical, the dose and the water. Contact time depends on the product, the dose and the water, and the label gives the figure. Chlorine dioxide products typically need much longer against cryptosporidium than against bacteria and viruses, and iodine and chlorine are not reliable against it at all. Cold or cloudy water slows everything down, so follow the label rather than guessing.
What happens if my water filter freezes?
Water left inside a hollow-fiber filter can freeze and split the fibers, and the damage is invisible from the outside. A filter that has frozen should be considered unreliable and retired. On cold trips, blow the filter clear after use and sleep with it inside your jacket or sleeping bag, and carry chemical treatment as a backup.