First aid & blisters on the trail
Most trail injuries are small, preventable and annoying — a hot spot that becomes a blister, a scraped shin, a rolled ankle on loose rock. Here is what to carry, what to do with it, and the point at which the honest answer is to stop hiking and get help.

In plain English
A blister is your skin's way of saying something has been rubbing too long. Picture rubbing your thumb on a rough table over and over. At first it gets warm, then sore, then a bubble of fluid forms. On a hike, the table is your shoe and the rubbing happens thousands of times.
The good news is that you get a warning. The warm, stinging patch, called a hot spot, shows up before the blister. If you stop and cover it then, the blister often never forms.
A trail first-aid kit is not a hospital in a bag. It is a small set of supplies for the common problems: rubbed feet, small cuts, splinters, ticks and twisted ankles. For anything bigger, the kit's job is to help you get out safely and reach real medical care.
The short answer
Carry a small kit you actually know how to use, stop at the first hot spot and cover it before it becomes a blister, and keep any wound clean and covered. Treat a fresh sprain with rest, ice, compression and elevation. Head for help if you see signs of infection, cannot bear weight, or the wound is deep.
What belongs in a trail first-aid kit
A hiking kit is not a miniature clinic. It is a small, deliberately chosen set of supplies for the handful of things that actually go wrong on day hikes and weekends: friction, small cuts, splinters, stings, and joints that get twisted on uneven ground. Think in categories rather than brands, and keep the whole thing light enough that it never gets left behind — the best kit is the one that is in your pack on the day you need it.
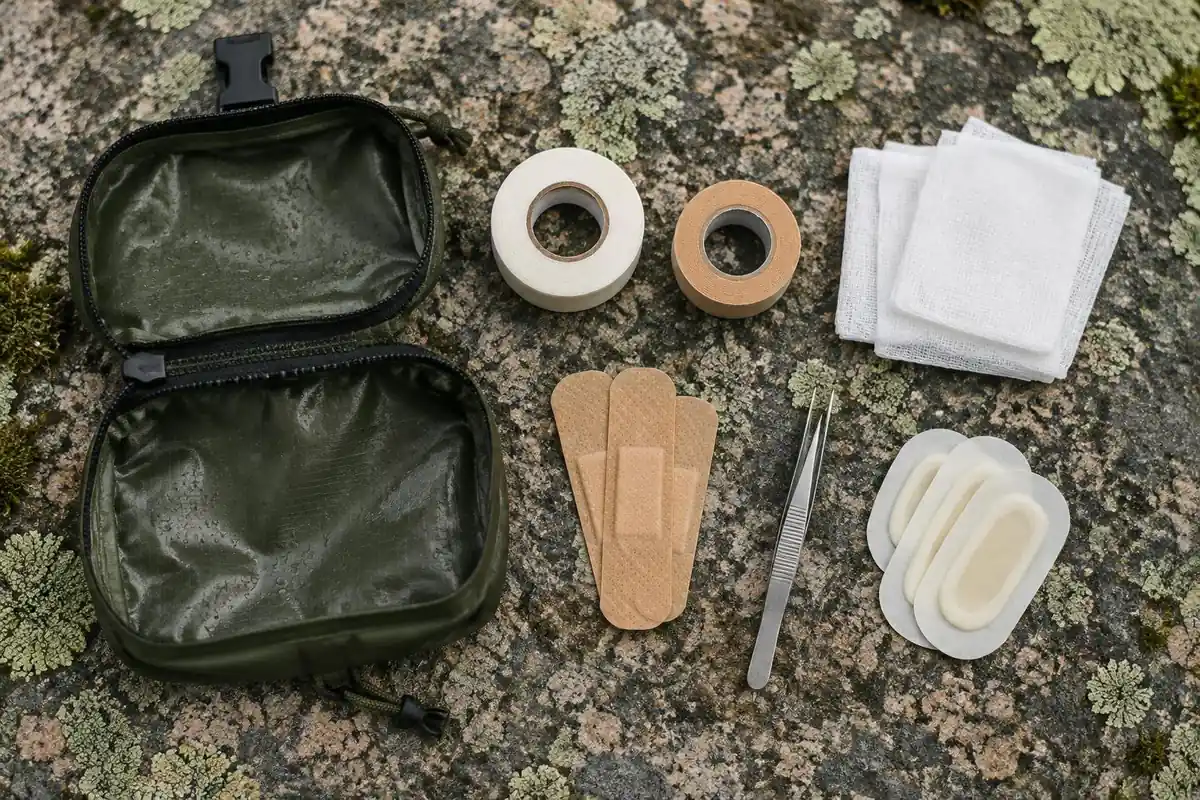
- Blister supplies. Moleskin or blister-specific padding, a roll of athletic or kinesiology tape, and small scissors to shape them. This is the category you will use most.
- Wound cover. Adhesive bandages in a couple of sizes, sterile gauze pads, and a roll of tape or a self-adhering wrap to hold a dressing on.
- Cleaning. Antiseptic wipes, and ideally a way to irrigate a wound — a squeeze of your treated drinking water works.
- Tools. Tweezers for splinters and ticks, small scissors, and a pair of disposable gloves so you can help someone else safely.
- Support. An elastic wrap for a rolled ankle or a tweaked knee, which doubles as compression for a bleeding wound.
- Protection and warmth. An emergency blanket, sun protection, and insect repellent for the conditions you are heading into.
- Personal items. Any medication you carry, over-the-counter pain relief taken per the label instructions, and anything prescribed for your own known conditions — plus a note of what it is, in case someone else has to find it in your pack.
- Information. A card with emergency contacts, your group's planned route and return time, and any allergies or conditions a responder should know about.
Repack it after every trip so it is not empty the next time, and check dates on anything that expires. Where the kit lives matters too: it belongs somewhere you can reach without unpacking the whole bag, which is worth thinking about when you build your packing list.
Preventing blisters: the part that actually works
A blister is friction plus moisture plus time. Remove any one of those three and it usually does not form, which is why prevention is far more effective than treatment. Nearly every blister on a well-prepared hiker traces back to a boot that does not fit, a sock that holds sweat, grit that got inside, or a hot spot that got ignored for another mile.
Start with fit. Boots should hold your heel still while leaving room for toes to spread and slide forward on descents. Too tight creates pressure points; too loose lets the heel lift and rub on every step. Lacing is a real tool here — a heel-lock lacing pattern pulls the heel back into the pocket on steep downhills, where most heel blisters are earned.
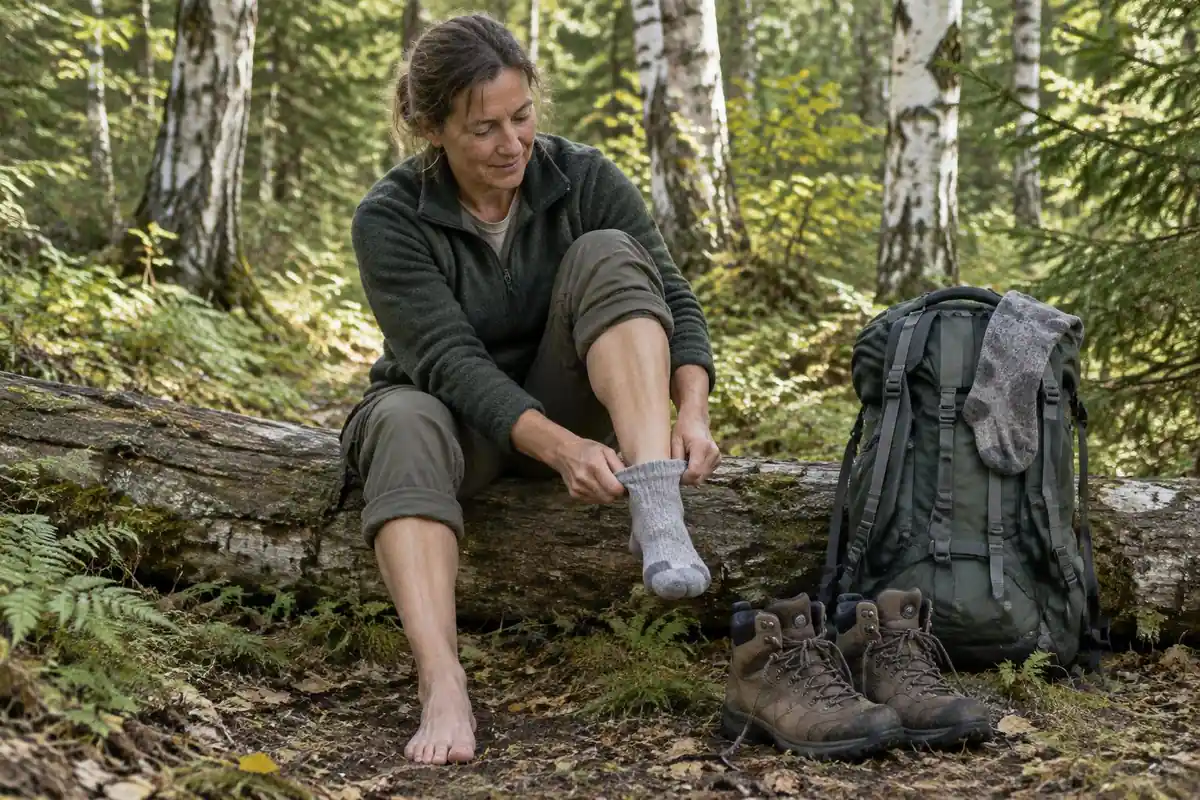
Then socks. Cotton holds moisture against the skin and is the single worst choice for long days. Wool or synthetic hiking socks move sweat away and keep their loft under load. Many hikers get on well with a thin liner sock under a thicker one so the two layers slide against each other instead of against skin. Carry a dry spare pair and change midway on a long or wet day; it feels like a luxury and behaves like insurance.
Manage the small stuff. Shake grit and pine needles out of your boots at breaks. Trim toenails before a trip. If you know a specific spot always rubs — the back of a heel, the side of a little toe — tape it flat before you start rather than waiting to see what happens.
Stop at the hot spot. That warm, stinging patch is the blister forming, and it is the cheapest problem you will be offered all day. Five minutes with a boot off now saves five miles of limping later. Pushing through a hot spot is one of the classic errors in our hiking dos and don'ts.
If a blister has already formed
The general first-aid principle is simple: the skin over an intact blister is the best dressing it will ever have, so protect it rather than open it. Clean the area, build a doughnut of moleskin or padding around the blister so the raised part sits in the hole and nothing presses directly on it, and secure it with tape smoothed flat — a wrinkle under tape becomes tomorrow's blister. Then fix whatever caused it before you put the boot back on.
If a blister has already torn open, treat it as a wound: clean it gently, leave the loose flap of skin in place if it is still attached, cover it with a sterile dressing, and keep it covered and as dry as conditions allow for the rest of the hike.
Do
- Stop as soon as you feel heat or rubbing, not at the next viewpoint.
- Clean and dry the skin before anything sticky goes on it.
- Pad around an intact blister so nothing presses on the dome.
- Smooth tape flat with no folds, creases or trailing edges.
- Find and fix the cause — lacing, sock bunching, grit in the boot.
- Check it at every break, and again at camp or the car.
Don't
- Open a deep, blood-filled or already-inflamed blister on the trail.
- Peel away skin that is still attached over a torn blister.
- Tape directly over a dome of fluid and keep walking on it.
- Use grubby hands or an unsterilized tool on broken skin.
- Ignore spreading redness, heat or pus and hope it settles.
- Keep hiking in the sock and boot that caused the problem.
Basic wound care, sprains and strains
Cuts and scrapes. Stop any bleeding with firm, direct pressure through a clean dressing. Once it slows, rinse the wound well with clean drinking water to flush out dirt and grit, then cover it with a sterile dressing and keep it covered. Grit left in a wound is the most common reason a small scrape on day one looks angry on day two, so spend the time rinsing properly rather than dabbing at it.
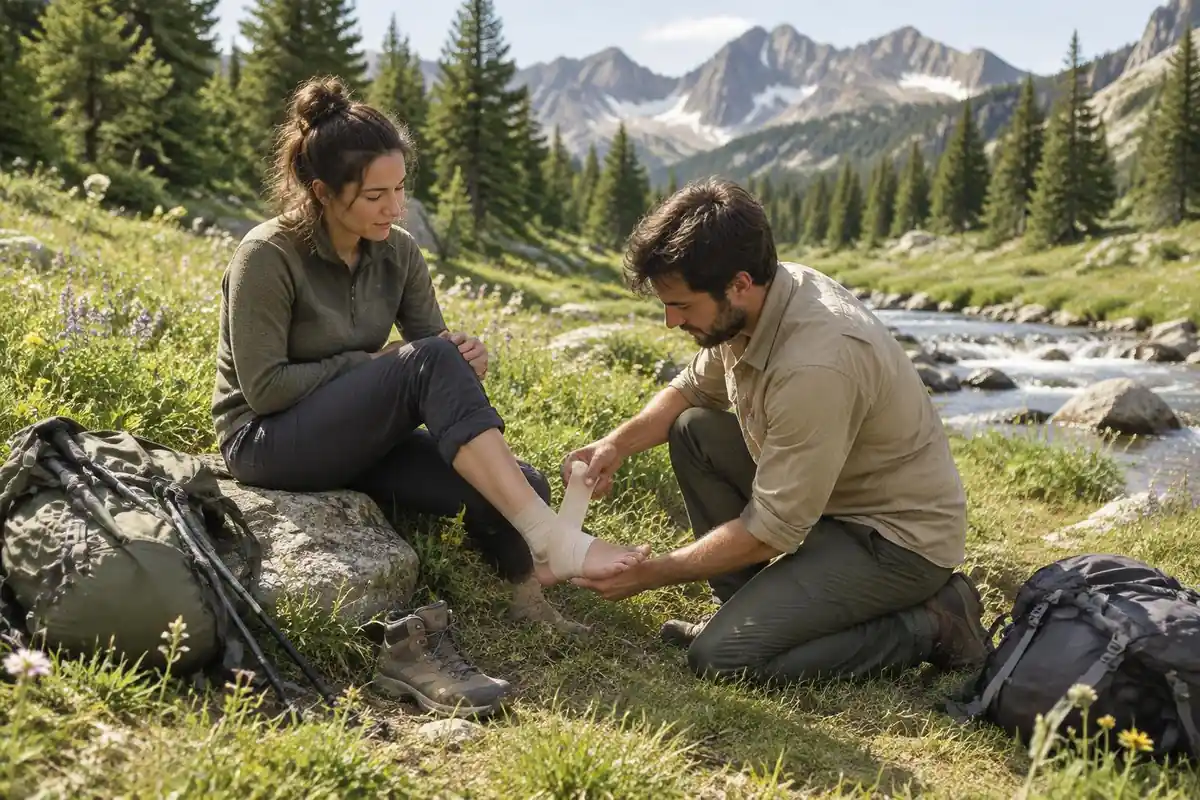
Sprains and strains. For a fresh rolled ankle or tweaked knee, the familiar starting point is RICE: rest it rather than testing how much it hurts, apply ice or cold water if you have it, add gentle compression with an elastic wrap that is firm but never tight enough to numb or discolor the foot, and elevate the limb when you stop. Loosen the wrap immediately if swelling increases below it.
The real decision with a lower-limb injury is whether to walk out. An ankle you can weight cautiously, with the boot left laced for support, is usually walkable at a slow pace with trekking poles and someone beside you. One that will not take your weight is not, and continuing on it risks turning a manageable situation into a rescue. Being honest about this is easier when you already know the trail and your own limits — which is one of the quieter benefits of training and building fitness before the hike rather than during it.
When this is beyond trail first aid
Trail first aid is for small problems and for stabilizing bigger ones long enough to get out. Some things are simply past that line, and recognizing them early is the skill that matters most. End the hike and get to medical care for any of the following:
- Signs of infection. Spreading redness, warmth, swelling, increasing pain, pus, red streaking from the wound, or a fever. These do not improve with more miles.
- Inability to bear weight. If a leg, ankle or foot will not take your weight, the trip is over — plan an evacuation rather than a hobble.
- Deep or serious wounds. Anything gaping, heavily bleeding, bleeding that will not stop with sustained pressure, deep punctures, or any animal bite.
- Head, neck or back injury. Any loss of consciousness, confusion, repeated vomiting, or neck and back pain after a fall needs professional assessment, not a self-assessment.
- Anything you do not understand. Breathing difficulty, chest pain, a severe allergic reaction, or symptoms that are getting worse rather than better. Uncertainty is itself a reason to go.
Getting out is its own plan. Know where the nearest trailhead is — not always the one you came from — carry a way to call for help and a backup, and remember that cell coverage in the backcountry is a bonus rather than a feature. Tell someone at home your route and return time before you leave, every time, so a missed check-in starts a response without you having to ask for one. The rest of the Trail Smarts section covers the planning habits that make the difference.
This is general trail-craft, not medical or emergency advice. Nothing here is a diagnosis or a substitute for care from a qualified professional. For first aid, take a recognized wilderness first-aid course and practice the skills before you need them; in a genuine emergency, call your local emergency number (911 in the US) as soon as you can.
What the injury data says to prepare for
A 2023 systematic review of injuries among hikers found blisters and ankle sprains to be the most common, with blisters making up 8 to 33 percent of reported injuries, and the lower limb the most commonly injured area in every study reviewed.1 Military load-carriage research points the same way, listing foot blisters among the most common injuries from carrying heavy packs for long periods.2
That is a strong argument for spending kit weight on foot care and ankle support rather than on rarely used extras. The National Park Service suggests starting from a pre-made first-aid kit and adapting it to the trip and your own medical needs,3 and it recommends learning basic wilderness first aid, especially for backcountry trips.4 Supplies only help if someone in the group knows how to use them.
Blister prevention, by the dermatologists
The American Academy of Dermatology recommends nylon or moisture-wicking socks, shoes that are neither too tight nor too loose, and adhesive moleskin or soft bandages over problem areas. It also points out that cotton soaks up sweat, which leads to friction and chafing.5 Fit starts at the store: leaving about half an inch between your longest toe and the tip of the shoe helps on descents, when feet slide forward.6
Most blisters heal on their own in one to two weeks, according to the AAD, but redness, pus or swelling are signs of infection that call for a doctor.5
Ticks and snakes: two problems with specific rules
The CDC advises removing an attached tick as soon as possible rather than waiting to see a healthcare provider. Grip it with clean, fine-tipped tweezers close to the skin and pull with steady, even pressure without twisting. Folk methods such as petroleum jelly, heat or nail polish are on the CDC's do-not list.7 Afterward, watch the spot: early Lyme disease symptoms appear 3 to 30 days after a bite, and the rash does not always look like a classic bull's-eye.8 See a doctor if a rash or fever develops.7
Snakebites are different: Yosemite's rangers state plainly that all rattlesnake bites are medical emergencies.9 There is no trail kit fix, so the plan is to get help fast.
Getting help can take time. Search and rescue can take hours or days depending on weather and resources, which is why the park service recommends a whistle, since it carries farther than a voice and saves energy.10
Frequently asked questions
What should be in a hiking first-aid kit?
Build it around the problems you will actually have: blister supplies, adhesive bandages and gauze in a couple of sizes, tape, antiseptic wipes, tweezers and small scissors, gloves, an elastic wrap for sprains, an emergency blanket, and any personal medication you carry. Add a card with emergency contacts and your group's plan.
How do you stop a blister while hiking?
Stop the moment you feel a hot spot — that warm, rubbing patch is the blister forming. Take the boot off, dry the skin, and cover the area with moleskin, blister tape or athletic tape smoothed flat with no wrinkles. Then find the cause: a loose lace, a bunched sock, grit inside the boot.
Should you pop a blister on the trail?
General first-aid guidance is to leave an intact blister alone, because the skin over it is the best dressing it has. Cover it with a doughnut of padding and keep hiking. Deep, blood-filled or already-infected blisters are not something to open on a trail — protect them and get them looked at.
Does RICE still apply to a twisted ankle on the trail?
Rest, ice, compression and elevation remain the common first response to a fresh sprain or strain. On trail that usually means stopping, cooling the joint if you have cold water or snow, wrapping it firmly but not tightly, and propping it up during breaks — then deciding honestly whether you can walk out.
When is a trail injury beyond first aid?
Get to help for spreading redness, heat, swelling, pus or a fever; for an injury you cannot bear weight on; for deep, gaping or heavily bleeding wounds; for animal bites and deep puncture wounds; and for any head, neck or back injury. Any doubt at all counts as a reason to turn around.